Sunday, October 27, 2013

Coffin Racer for Denton's Day of the Dead Festival

We have been hard at work in the Studio so we decided to take some time and create something fun. A friend of mine informed us that Denton hosts a Day of the Dead Festival each year. This festival is home to a soapbox race featuring coffin cars. Having never even been to a soapbox race, let alone building a soap box racer, we signed up. Over a team meeting, we came up with Race in Peace (R.I.P.) as our coffin racer’s name. We wanted to do something different from the competitors so we designed our coffin to be colorful and groovy.  Our creative process was as follows.

Inspiration: We decide on a trike


 Ken built the chassis using a steel frame, which included a steering wheel. We knew that the coffin car was something that we were going to want to keep so we weren’t thrilled about the idea of slamming it into a stack of hay bails to stop the momentum. Ken fabricated a brake system that allowed me to push on the pedals and it would effectively stop the back two wheels.

Completed Chassis

For the body, we cut the frame of the coffin on the CNC machine. The total length of the coffin ended up being nine feet long to house the chassis and allow for more than one driver. Ken hand-shaped a wood fairing for design and aerodynamics.

Coffin racer body

Hand carved fairing

To execute our vision, we made the decision to paint the body like an old school red and white VW bus and add some groovy details.

Base coat


Finishing touches


Weighing in at 223 lbs. Is there a prize for the heaviest car?


We had so much fun the day of the festival. We brought our kids to cheer us on as we competed against 40 other coffin cars. We ended up placing 10th out of 40. We were very pleased with this considering it was our first attempt at soapbox racing. Here I am ready for race #2.


Thank you to all of our friends and family that came out to help and root us on. See you next year Denton!

Monday, October 21, 2013

Our Version of a Cat Scratching Post

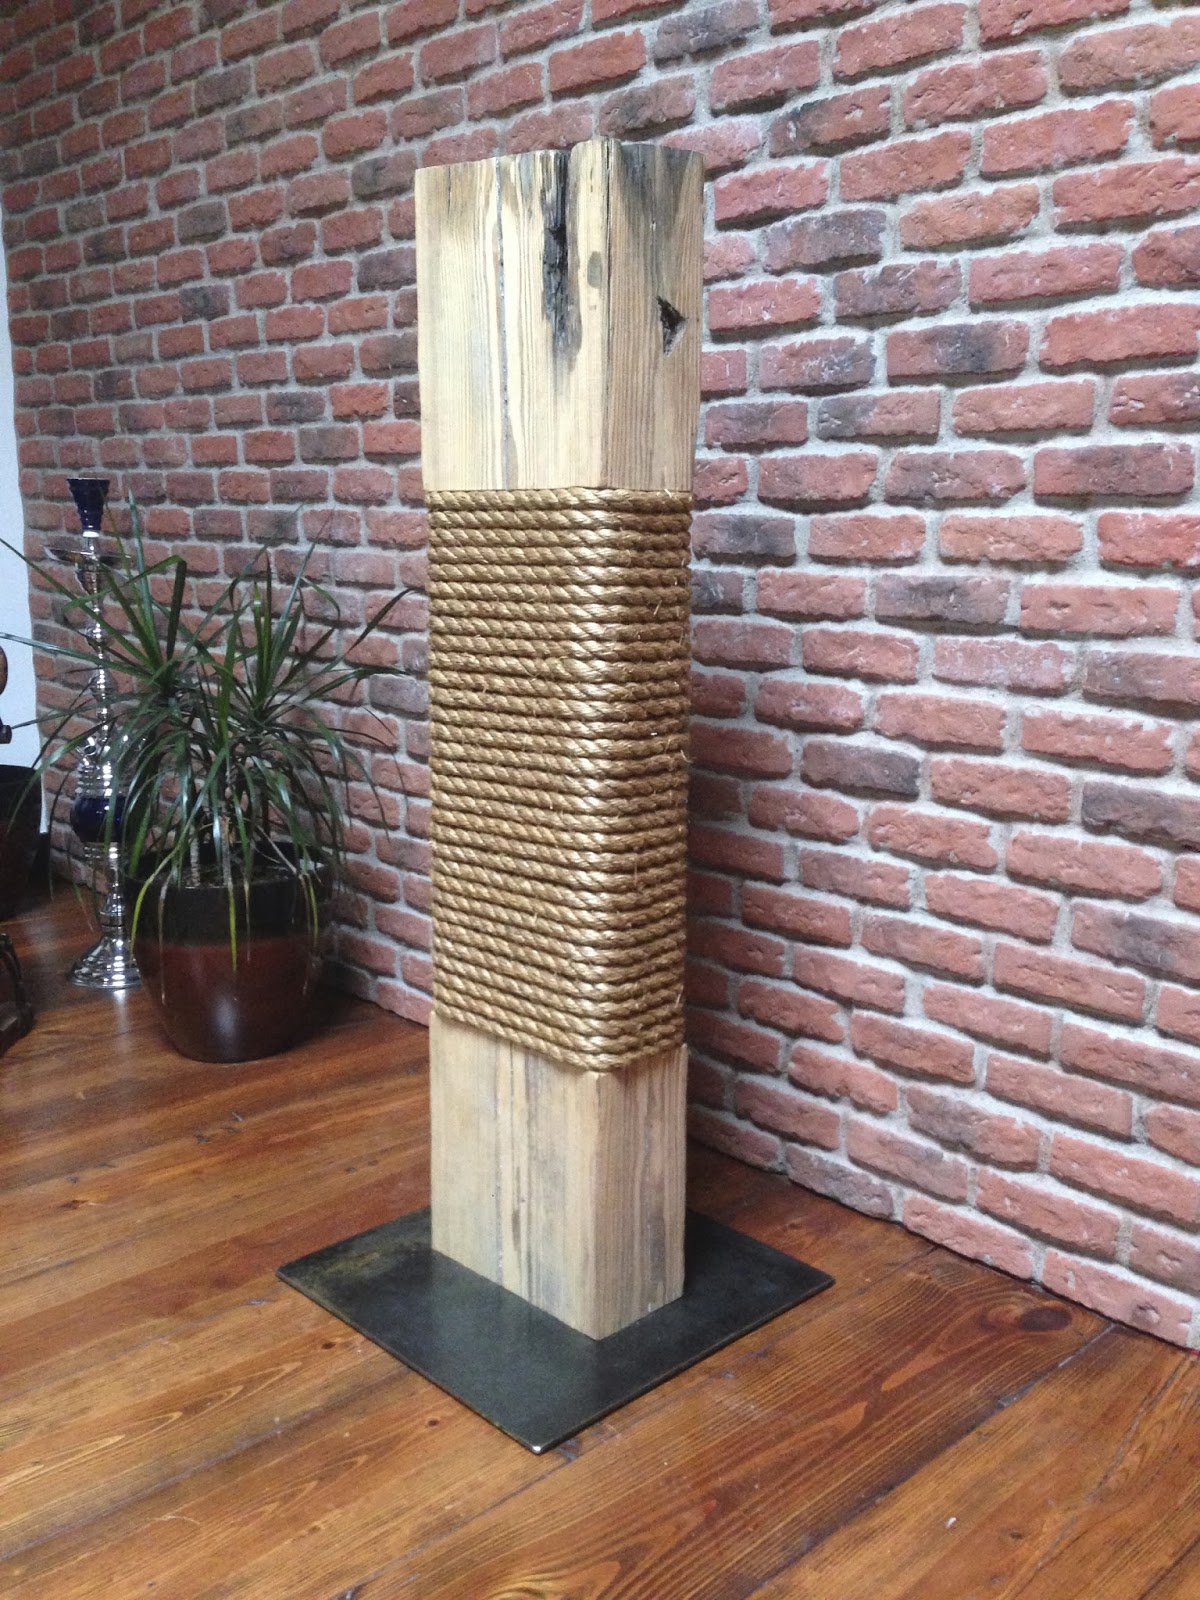
Here at the Studio, we have two furry friends named Amos and Loki. We needed a scratching solution for them so that they would not destroy furniture throughout the space. In a hunt to find something to go in the Studio that wasn’t an eyesore, we came up short. We decided to fabricate something ourselves that would incorporate design and functionality.  We started out with a four-foot tall, raw, reclaimed pine beam. Ken hand chiseled a portion of the beam so that we could wrap it in .75 inch manilla rope and it would be flush with the wood.
 
Hand chiseling for the inlayed rope


In order to secure the rope, we wanted it to be discreet. We used a peg system on the backside to attach the ends of the manilla rope for a seamless design. Here is the peg system before we put on the rope.

Peg system

 For the base, we chose .25 inch steel plate with an oxidized patina.

.25 inch steel base


Side view

The cat scratching post is now a sculpture in our living room that is both beautiful and functional. The cats are able to scratch in style.

Amos enjoying her cat scratching post


Friday, August 23, 2013

The Factory Cart

I am constantly surprised about the difficulty of handling some of our supplies and materials. Initially, we were positive that the forklifts would be enough to satisfy our handling needs but we were wrong. Because of this, we consistently have to design and fabricate stuff that can handle the sheer scale of our work. The handling techniques are often unexpected and the mass of our work continues to escalate.

With the hole between the warehouses completed, we needed a way to move materials back and forth between the two spaces.  Ken also needed a way to safely cut the large reclaimed timbers. The solution was a large factory cart that would serve multiple purposes. The cart would also allow us to receive materials from ground level and it would include rails on the bottom side so it could be moved with a forklift.

Steel frame on casters

The Studio requires something really large for the scale of materials that we use. However, there isn’t a lot of utility with a really long factory cart so Ken designed sliding extensions on both sides of the cart. The frame is steel and has an open center for cutting large pieces of wood. The cart also has removable handles and a sacrificial top.

Sliding extensions on both ends
It is a beast

We use this cart every single day in the Studio. It is so useful that we are contemplated fabricating a second one.

Wednesday, August 14, 2013

Connecting the Warehouses

Since we now have two warehouses side-by-side, we have the ability to connect the two so we can quickly access the materials stored next door. We keep our forklifts in the warehouse next door so we needed a connecting door that was large enough for our materials, and the forklifts. This would provide the studio with the ability to transfer equipment and materials from warehouse to warehouse seamlessly.

Before Picture

First, Ken met with a couple structural engineers to determine it was safe to cut a hole between the two structures. Instead of hiring contractors, Ken created a way to do the task himself (as usual). So for many days, the boys chipped away at a solid cinder block wall. Ken welded a structural doorframe that could accommodate for a garage door and reinforce the large hole.

Framed out


We now have a bay-sized garage door that allows us the ability to move materials and access our warehouse space with ease.


Monday, July 1, 2013

The Lonely Door

With the loft still being under construction, there isn’t a whole lot of privacy in the space. However, we made time to make one door. This door was considered to be the “test” door but the results were so amazing that we will be using the same technique to fabricate other doors when we get around to it.

Ken found some reclaimed flooring from a turn-of-the-century schoolhouse at our favorite salvage yard and there was enough to make two door fronts. Not wanting to use all the wood for one door, we decided to use the reclaimed flooring on one side and reclaimed cedar on the other.  The cedar was a reclaimed beam that we cut into veneer using the band saw and arranged in a random horizontal pattern.
Reclaimed school flooring in a vertical pattern on the front of the door

Reclaimed cedar in a horizontal configuration on backside


To add an industrial element, Ken fabricated steel hardware to incorporate into the design. Thus, completing the lavatory door.

Installed door with hardware


When the door is opened, there is a hint of fabulous red that shows around the edgeways.

Hint of Fabulous Red


 From the inside, the cedar door is beautiful. I still can’t decide which side is my favorite.

Look from the inside

 Hopefully we get around to making some more doors soon. 


Saturday, June 22, 2013

Tub (Final Phase)

When we began designing the Loft, we took a trip to Mexico and got inspired to incorporate a hot tub into our design. Staying true to the open concept, we decided to make it the focal point of the master suite. We went with a Jacuzzi two-person, chroma therapy soaking tub. Ken surrounded the tub with reclaimed timbers and finished them off with hand-forged steel. The results were stunning.


Custom, hand-forged steel for the corners

Tub surround

In order to fill up the tub, Ken got creative. He fabricated a water hose that comes from the ceiling, allowing the water to fall into the tub. Since the water had to fall 10 feet, water would splash outside of the tub. After several attempts, he created a laminar water nozzle that would align the molecules just perfectly so that the water falls into the tub and disperses within it so that there is no splashing. The water is turned on by the hand wheels on the wall between the tub and the steam shower.


Laminar nozzle from the ceiling

 This is my favorite architectural in the Loft, it is such a beautiful sight to see every morning.


Friday, March 1, 2013

Staircase (Final Phase)

With the LEDs and architectural element installed, it was time to make the stairs functional so that we could enjoy the deck just in time for warmer weather. The stairs are constructed of reclaimed timbers dating back to the 1800s from a building located in the Stockyards of Fort Worth, Texas. Each beam (stair) was hand-shaped and stained.

The chosen beams after they were hand-shaped


Lined up ready to be stained

 The steel step halfway up the staircase is for structural support and adds an additional element to the stairs. We are still debating on whether or not to leave the step as is or patina it for a darker steel look. The LED feature allows us to program the stairs to be any desired color with a remote. 

Completed Staircase

This architectural is important to us because it is the first thing you see when you walk into the loft. Your eyes are immediately drawn to it at the back of the warehouse. It creates an alluring ambience as the light from the skylights diminishes each evening.

View down the hallway just got a lot better

With the stairs finished, we are able to enjoy the deck upstairs for parties, yoga, gardening, and much more.
Stairs are finished!